openstack的搭建部署
1.虚拟网络编辑器
编辑–>虚拟网络编辑器
点击 更改设置
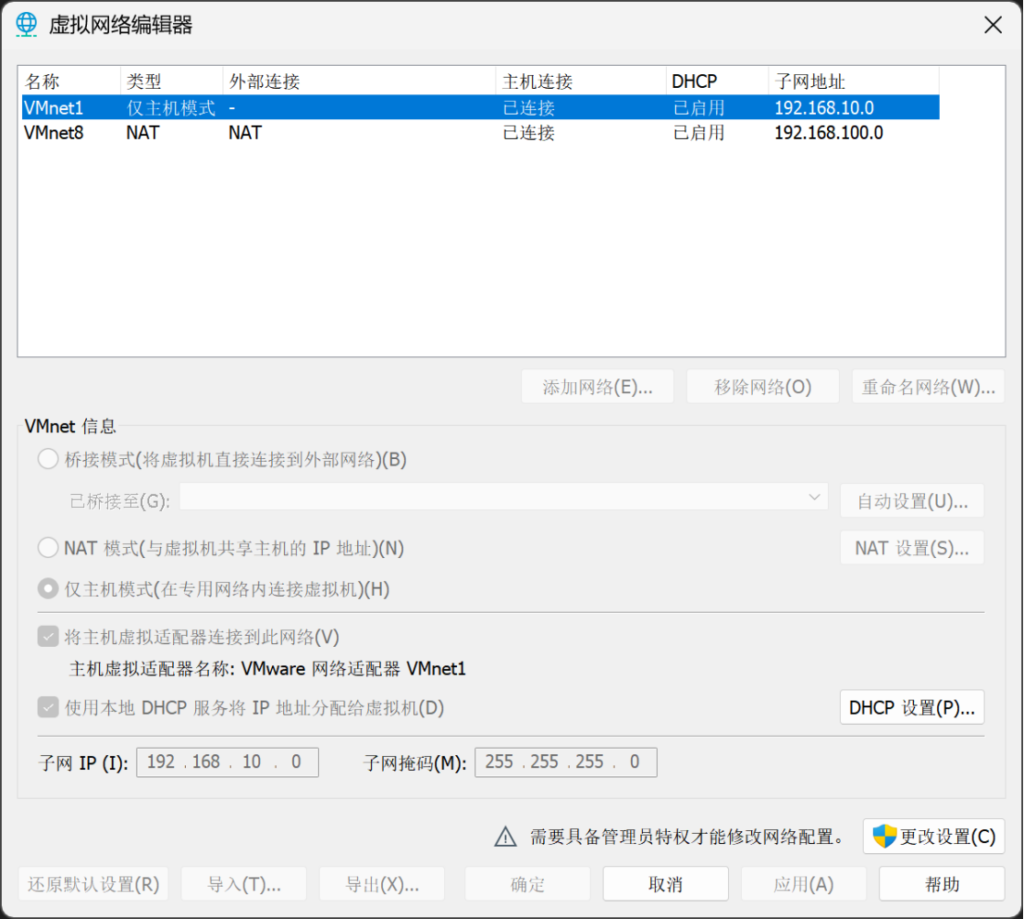
VMnet1
仅主机模式
子网IP:192.168.10.0 子网掩码 255.255.255.0
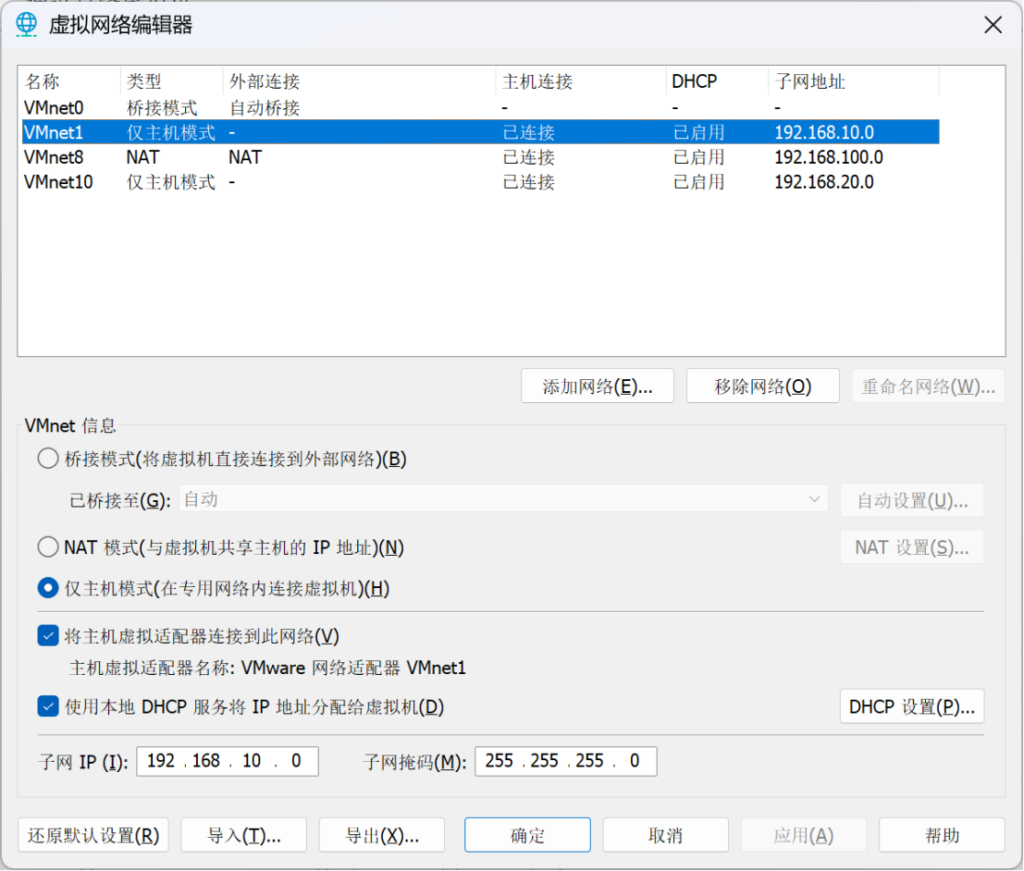
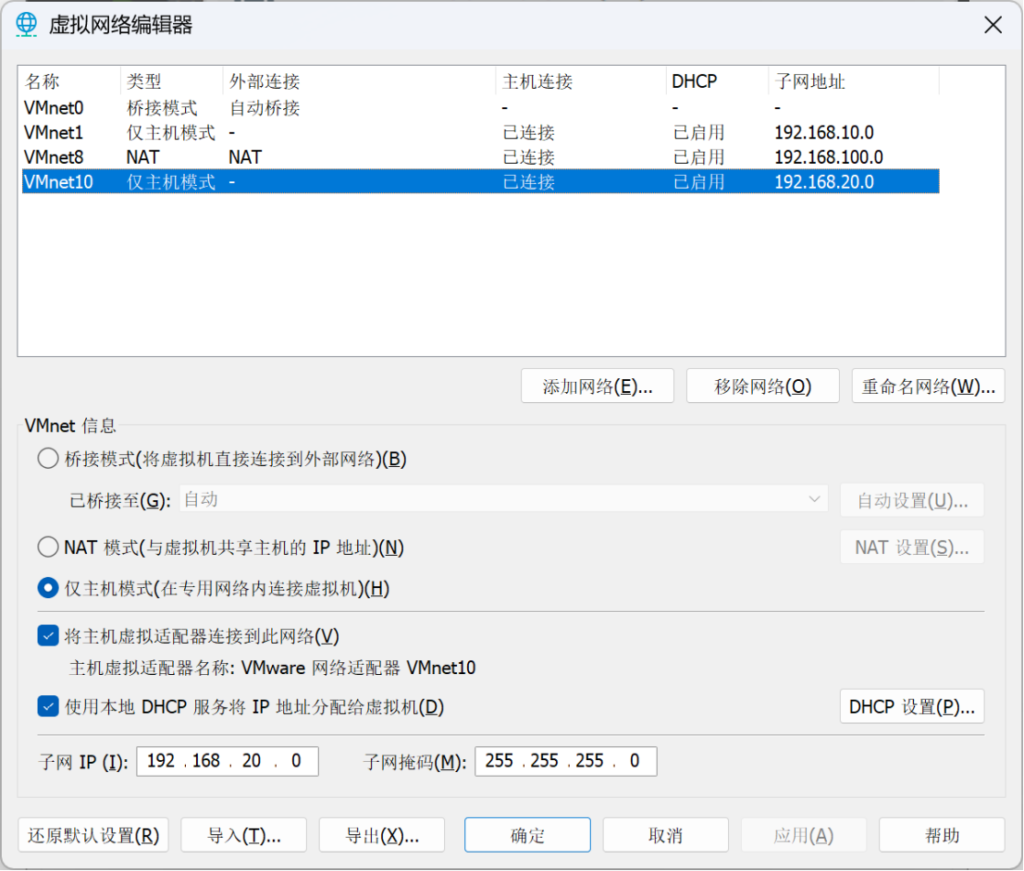
VMnet10(添加网络)
仅主机模式
子网IP:192.168.20.0 子网掩码 255.255.255.0
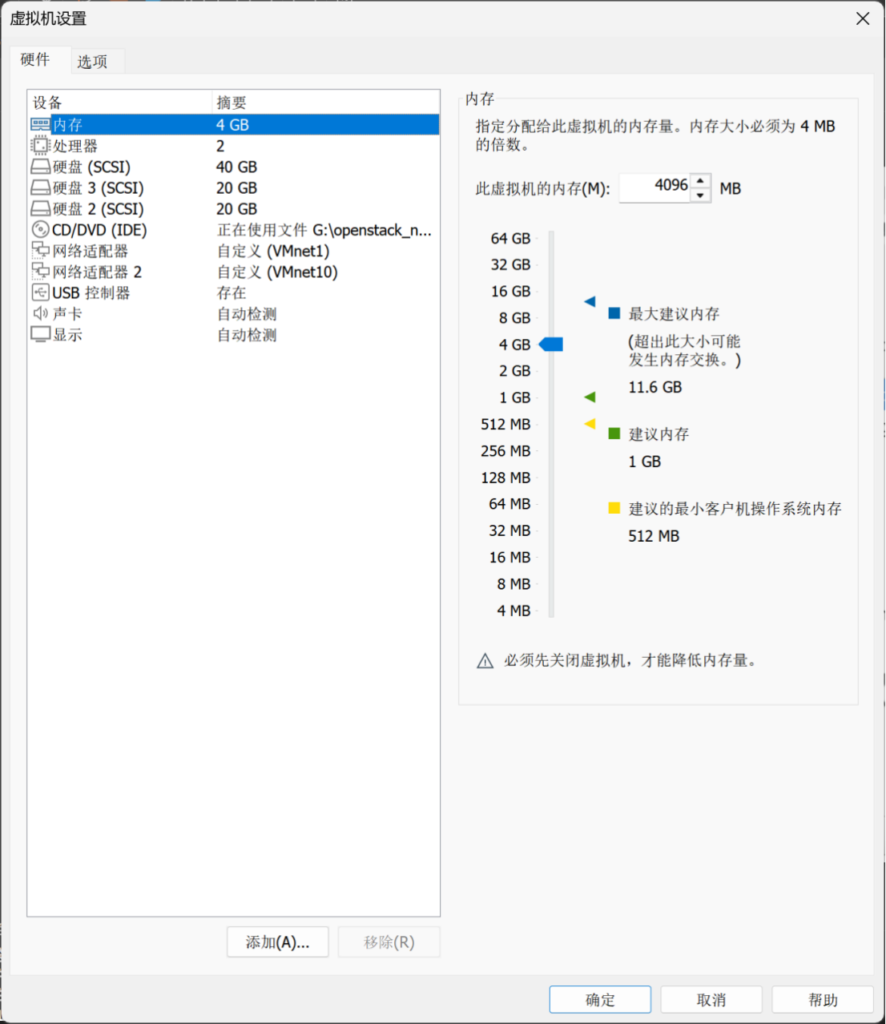
- 创建虚拟机
注意:
原视频作者使用centos7操作系统为CentOS-7-x86_64-DVD-1804.iso(下载链接:Index of /centos-vault/7.5.1804/isos/x86_64/)
通过测试以下操作可以实现openstack部署
而CentOS-7-x86_64-DVD-2009.iso等版本在后面执行
#iaas-install-neutron-controller.sh
有的会报错软件包libxslt版本比所需的版本新,导致了依赖性冲突。
后文有解决方法
3.进入centos进行网络配置
controller部分
#vi /etc/sysconfig/network-scripts/ifcfg-ens33
修改一下部分
BOOTPROTO=static
ONBOOT=yes
IPADDR=192.168.10.10
NETMASK=255.255.255.0
GATEWAY=192.168.10.1
#vi /etc/sysconfig/network-scripts/ifcfg-ens34
BOOTPROTO=static
ONBOOT=yes
IPADDR=192.168.20.10
NETMASK=255.255.255.0
systemctl restart network
compute部分
#vi /etc/sysconfig/network-scripts/ifcfg-ens33
修改一下部分
BOOTPROTO=static
ONBOOT=yes
IPADDR=192.168.10.20
NETMASK=255.255.255.0
GATEWAY=192.168.10.1
#vi /etc/sysconfig/network-scripts/ifcfg-ens34
BOOTPROTO=static
ONBOOT=yes
IPADDR=192.168.20.20
NETMASK=255.255.255.0
systemctl restart network
4.修改主机名称
使用Xshell 8连接虚拟机
如出现长时间连接不上
vi /etc/ssh/sshd_config
将UseDNS前面的#注释删掉,同时将UseDNS后面的yes改为no,保存后退出
systemctl restart sshd.service
controller部分
hostnamectl set-hostname controller
bash #显示修改的主机名
compute部分
hostnamectl set-hostname compute
bash #显示修改的主机名
5.配置/etc/hosts(域名解析)(controller,compute)
#vi /etc/hosts
两台虚拟机添加以下内容
192.168.10.10 controller
192.168.10.20 compute

通过ping controller和piing compute测试连通性
6.调整selinux以及防火墙(controller,compute)
setenforce 0
systemctl stop firewalld
这两个命令在重启系统后不会自动保持生效。这些命令只在当前会话或当前系统运行时有效。当系统重启后,SELinux 和防火墙的设置会恢复到它们在 /etc/selinux/config 和 firewalld 配置文件中定义的状态
若永久更改设置
vi /etc/selinux/config
SELINUX=enforcing改为SELINUX=disabled
systemctl stop firewalld
systemctl disable firewalld
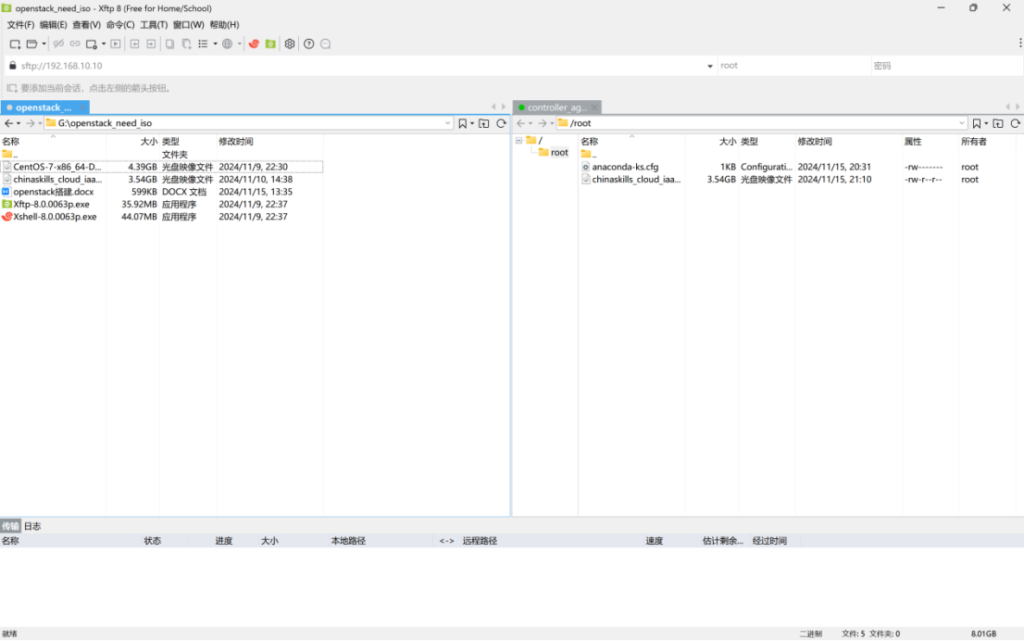
7.导入云平台软件包
使用Xftp 8连接虚拟机导入云平台软件包
8.配置YUM源
controller部分
mkdir /opt/centos
mkdir /opt/iaas
cd /etc/yum.repos.d/
rm -rf *
vi tay.repo
[centos]
name=centos
baseurl=file:///opt/centos
enabled=1
gpgcheck=0
[iaas]
name=iaas
baseurl=file:///opt/iaas/iaas-repo
enabled=1
gpgcheck=0
#mount -o loop /dev/cdrom /opt/centos/
若失败则查看虚拟机界面右下角点击系统磁盘–>连接

继续执行
#cd
#mount -o loop chinaskills_cloud_iaas.iso /opt/iaas/
执行命令以上命令只是临时挂载若重启则需要重新执行
若设置开机挂载则执行以下命令
#vi /etc/fstab
末尾添加以下内容
/dev/cdrom /opt/centos/ iso9660 defaults 0 0
/root/chinaskills_cloud_iaas.iso /opt/iaas/ iso9660 defaults 0 0
注意:每次开机前需检查系统磁盘是否挂载如上一步所示
yum repolist #检查是否挂载成功
下载vsftpd (controller)
#yum install vsftpd
#vi /etc/vsftpd/vsftpd.conf
最后一行添加
#anon_root=/opt
重启vsftpd服务
#systemctl restart vsftpd
#systemctl enable vsftpd
compute部分
mkdir /opt/centos
mkdir /opt/iaas
cd /etc/yum.repos.d/
rm -rf *
vi tay.repo
[centos]
name=centos
baseurl=ftp://controller/centos
enabled=1
gpgcheck=0
[iaas]
name=iaas
baseurl=ftp://controller/iaas/iaas-repo
enabled=1
gpgcheck=0
yum repolist #检查是否挂载成功
9.正式开始安装openstack
下载iaas-xiandian (controller,compute)
#yum install iaas-xiandian
配置openrc.sh
#vi /etc/xiandian/openrc.sh
Esc模式下输入
:%d
清空
点击i进入插入模式
复制以下内容
Xshell中可使用Ctrl+shift+v或点击鼠标滚轮中键进行粘贴
controller部分
#——————–system Config——————–##
#Controller Server Manager IP. example:x.x.x.x
HOST_IP=192.168.10.10
#Controller HOST Password. example:000000
HOST_PASS=000000
#Controller Server hostname. example:controller
HOST_NAME=controller
#Compute Node Manager IP. example:x.x.x.x
HOST_IP_NODE=192.168.10.20
#Compute HOST Password. example:000000
HOST_PASS_NODE=000000
#Compute Node hostname. example:compute
HOST_NAME_NODE=compute
#——————–Chrony Config——————-##
#Controller network segment IP. example:x.x.0.0/16(x.x.x.0/24)
network_segment_IP=192.168.10.10
#——————–Rabbit Config ——————##
#user for rabbit. example:openstack
RABBIT_USER=openstack
#Password for rabbit user .example:000000
RABBIT_PASS=000000
#——————–MySQL Config———————##
#Password for MySQL root user . exmaple:000000
DB_PASS=000000
#——————–Keystone Config——————##
#Password for Keystore admin user. exmaple:000000
DOMAIN_NAME=demo
ADMIN_PASS=000000
DEMO_PASS=000000
#Password for Mysql keystore user. exmaple:000000
KEYSTONE_DBPASS=000000
#——————–Glance Config——————–##
#Password for Mysql glance user. exmaple:000000
GLANCE_DBPASS=000000
#Password for Keystore glance user. exmaple:000000
GLANCE_PASS=000000
#——————–Nova Config———————-##
#Password for Mysql nova user. exmaple:000000
NOVA_DBPASS=000000
#Password for Keystore nova user. exmaple:000000
NOVA_PASS=000000
#——————–Neturon Config——————-##
#Password for Mysql neutron user. exmaple:000000
NEUTRON_DBPASS=000000
#Password for Keystore neutron user. exmaple:000000
NEUTRON_PASS=000000
#metadata secret for neutron. exmaple:000000
METADATA_SECRET=000000
#Tunnel Network Interface. example:x.x.x.x
INTERFACE_IP=192.168.10.10
#External Network Interface. example:eth1
INTERFACE_NAME=ens34
#External Network The Physical Adapter. example:provider
Physical_NAME=sdb
#First Vlan ID in VLAN RANGE for VLAN Network. exmaple:101
minvlan=1
#Last Vlan ID in VLAN RANGE for VLAN Network. example:200
maxvlan=500
#——————–Cinder Config——————–##
#Password for Mysql cinder user. exmaple:000000
CINDER_DBPASS=000000
#Password for Keystore cinder user. exmaple:000000
CINDER_PASS=000000
#Cinder Block Disk. example:md126p3
BLOCK_DISK=sdb
#——————–Swift Config———————##
#Password for Keystore swift user. exmaple:000000
SWIFT_PASS=000000
#The NODE Object Disk for Swift. example:md126p4.
OBJECT_DISK=sdc
#The NODE IP for Swift Storage Network. example:x.x.x.x.
STORAGE_LOCAL_NET_IP=192.168.10.20
#——————–Heat Config———————-##
#Password for Mysql heat user. exmaple:000000
HEAT_DBPASS=000000
#Password for Keystore heat user. exmaple:000000
HEAT_PASS=000000
#——————–Zun Config———————–##
#Password for Mysql Zun user. exmaple:000000
ZUN_DBPASS=000000
#Password for Keystore Zun user. exmaple:000000
ZUN_PASS=000000
#Password for Mysql Kuryr user. exmaple:000000
KURYR_DBPASS=000000
#Password for Keystore Kuryr user. exmaple:000000
KURYR_PASS=000000
#——————–Ceilometer Config—————-##
#Password for Gnocchi ceilometer user. exmaple:000000
CEILOMETER_DBPASS=000000
#Password for Keystore ceilometer user. exmaple:000000
CEILOMETER_PASS=000000
#——————–AODH Config—————-##
#Password for Mysql AODH user. exmaple:000000
AODH_DBPASS=000000
#Password for Keystore AODH user. exmaple:000000
AODH_PASS=000000
#——————–Barbican Config—————-##
#Password for Mysql Barbican user. exmaple:000000
BARBICAN_DBPASS=000000
#Password for Keystore Barbican user. exmaple:000000
BARBICAN_PASS=000000
compute部分
#——————–system Config——————–##
#Controller Server Manager IP. example:x.x.x.x
HOST_IP=192.168.10.10
#Controller HOST Password. example:000000
HOST_PASS=000000
#Controller Server hostname. example:controller
HOST_NAME=controller
#Compute Node Manager IP. example:x.x.x.x
HOST_IP_NODE=192.168.10.20
#Compute HOST Password. example:000000
HOST_PASS_NODE=000000
#Compute Node hostname. example:compute
HOST_NAME_NODE=compute
#——————–Chrony Config——————-##
#Controller network segment IP. example:x.x.0.0/16(x.x.x.0/24)
network_segment_IP=192.168.10.10
#——————–Rabbit Config ——————##
#user for rabbit. example:openstack
RABBIT_USER=openstack
#Password for rabbit user .example:000000
RABBIT_PASS=000000
#——————–MySQL Config———————##
#Password for MySQL root user . exmaple:000000
DB_PASS=000000
#——————–Keystone Config——————##
#Password for Keystore admin user. exmaple:000000
DOMAIN_NAME=demo
ADMIN_PASS=000000
DEMO_PASS=000000
#Password for Mysql keystore user. exmaple:000000
KEYSTONE_DBPASS=000000
#——————–Glance Config——————–##
#Password for Mysql glance user. exmaple:000000
GLANCE_DBPASS=000000
#Password for Keystore glance user. exmaple:000000
GLANCE_PASS=000000
#——————–Nova Config———————-##
#Password for Mysql nova user. exmaple:000000
NOVA_DBPASS=000000
#Password for Keystore nova user. exmaple:000000
NOVA_PASS=000000
#——————–Neturon Config——————-##
#Password for Mysql neutron user. exmaple:000000
NEUTRON_DBPASS=000000
#Password for Keystore neutron user. exmaple:000000
NEUTRON_PASS=000000
#metadata secret for neutron. exmaple:000000
METADATA_SECRET=000000
#Tunnel Network Interface. example:x.x.x.x
INTERFACE_IP=192.168.10.20
#External Network Interface. example:eth1
INTERFACE_NAME=ens34
#External Network The Physical Adapter. example:provider
Physical_NAME=sdb
#First Vlan ID in VLAN RANGE for VLAN Network. exmaple:101
minvlan=1
#Last Vlan ID in VLAN RANGE for VLAN Network. example:200
maxvlan=500
#——————–Cinder Config——————–##
#Password for Mysql cinder user. exmaple:000000
CINDER_DBPASS=000000
#Password for Keystore cinder user. exmaple:000000
CINDER_PASS=000000
#Cinder Block Disk. example:md126p3
BLOCK_DISK=sdb
#——————–Swift Config———————##
#Password for Keystore swift user. exmaple:000000
SWIFT_PASS=000000
#The NODE Object Disk for Swift. example:md126p4.
OBJECT_DISK=sdc
#The NODE IP for Swift Storage Network. example:x.x.x.x.
STORAGE_LOCAL_NET_IP=192.168.10.20
#——————–Heat Config———————-##
#Password for Mysql heat user. exmaple:000000
HEAT_DBPASS=000000
#Password for Keystore heat user. exmaple:000000
HEAT_PASS=000000
#——————–Zun Config———————–##
#Password for Mysql Zun user. exmaple:000000
ZUN_DBPASS=000000
#Password for Keystore Zun user. exmaple:000000
ZUN_PASS=000000
#Password for Mysql Kuryr user. exmaple:000000
KURYR_DBPASS=000000
#Password for Keystore Kuryr user. exmaple:000000
KURYR_PASS=000000
#——————–Ceilometer Config—————-##
#Password for Gnocchi ceilometer user. exmaple:000000
CEILOMETER_DBPASS=000000
#Password for Keystore ceilometer user. exmaple:000000
CEILOMETER_PASS=000000
#——————–AODH Config—————-##
#Password for Mysql AODH user. exmaple:000000
AODH_DBPASS=000000
#Password for Keystore AODH user. exmaple:000000
AODH_PASS=000000
#——————–Barbican Config—————-##
#Password for Mysql Barbican user. exmaple:000000
BARBICAN_DBPASS=000000
#Password for Keystore Barbican user. exmaple:000000
BARBICAN_PASS=000000
开始运行脚本
iaas-pre-host.sh(controller,compute)
完成后重启
reboot
重新连接虚拟机
继续运行脚本
iaas-install-mysql.sh(controller)
iaas-install-keystone.sh(controller)
iaas-install-glance.sh(controller)
iaas-install-nova-controller.sh(controller)
iaas-install-nova-compute.sh(compute)
iaas-install-neutron-controller.sh(controller)
若显示以下报错
1.1.28-5.el7,它被软件包 libxslt-python-1.1.28-5.el7.x86_64 需要
—> 软件包 openpgm.x86_64.0.5.2.122-2.el7 将被 安装
–> 解决依赖关系完成
错误:软件包:libxslt-python-1.1.28-5.el7.x86_64 (iaas)
需要:libxslt = 1.1.28-5.el7
已安装: libxslt-1.1.28-6.el7.x86_64 (@anaconda)
libxslt = 1.1.28-6.el7
可用: libxslt-1.1.28-5.el7.x86_64 (iaas)
libxslt = 1.1.28-5.el7
您可以尝试添加 –skip-broken 选项来解决该问题
您可以尝试执行:rpm -Va –nofiles –nodigest报错显示其中的anaconda是虚拟机上安装的还是宿主主机上安装的
可查找可用的旧版本: 首先,需要确认是否有旧版本的 libxslt 可用。您可以使用以下命令来查找:
yum list available libxslt
这将列出所有可用的 libxslt 版本,包括旧版本。
降级 libxslt: 如果找到了所需的旧版本(1.1.28-5.el7),您可以使用以下命令来降级:
yum downgrade libxslt-1.1.28-5.el7.x86_64
这将把 libxslt 降级到 1.1.28-5.el7 版本。
清理缓存: 在执行降级操作之前,建议清理 yum 缓存,以确保获取最新的包信息:
yum clean all
重新安装依赖: 降级完成后,您可以尝试重新安装 libxslt-python:
yum install libxslt-python-1.1.28-5.el7.x86_64
iaas-install-neutron-compute.sh(compute)
iaas-install-dashboard.sh(controller)
接下来访问 192.168.10.10/dashboard
用户名:admin
密码:000000

登录界面
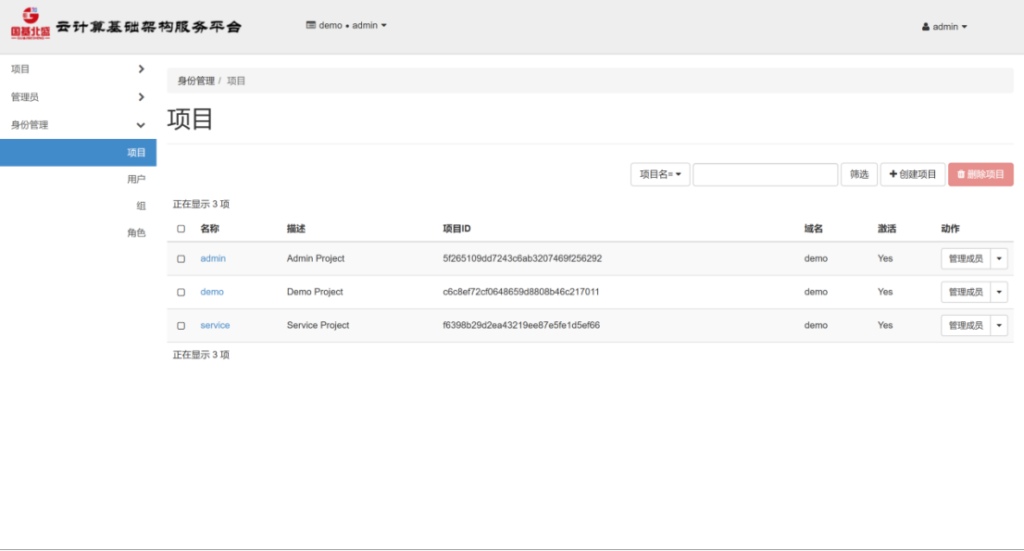
至此初步搭建完成